Your cart is currently empty!
Keeping the Canvas of Your Pop-Up Camper Clean and Well-Maintained
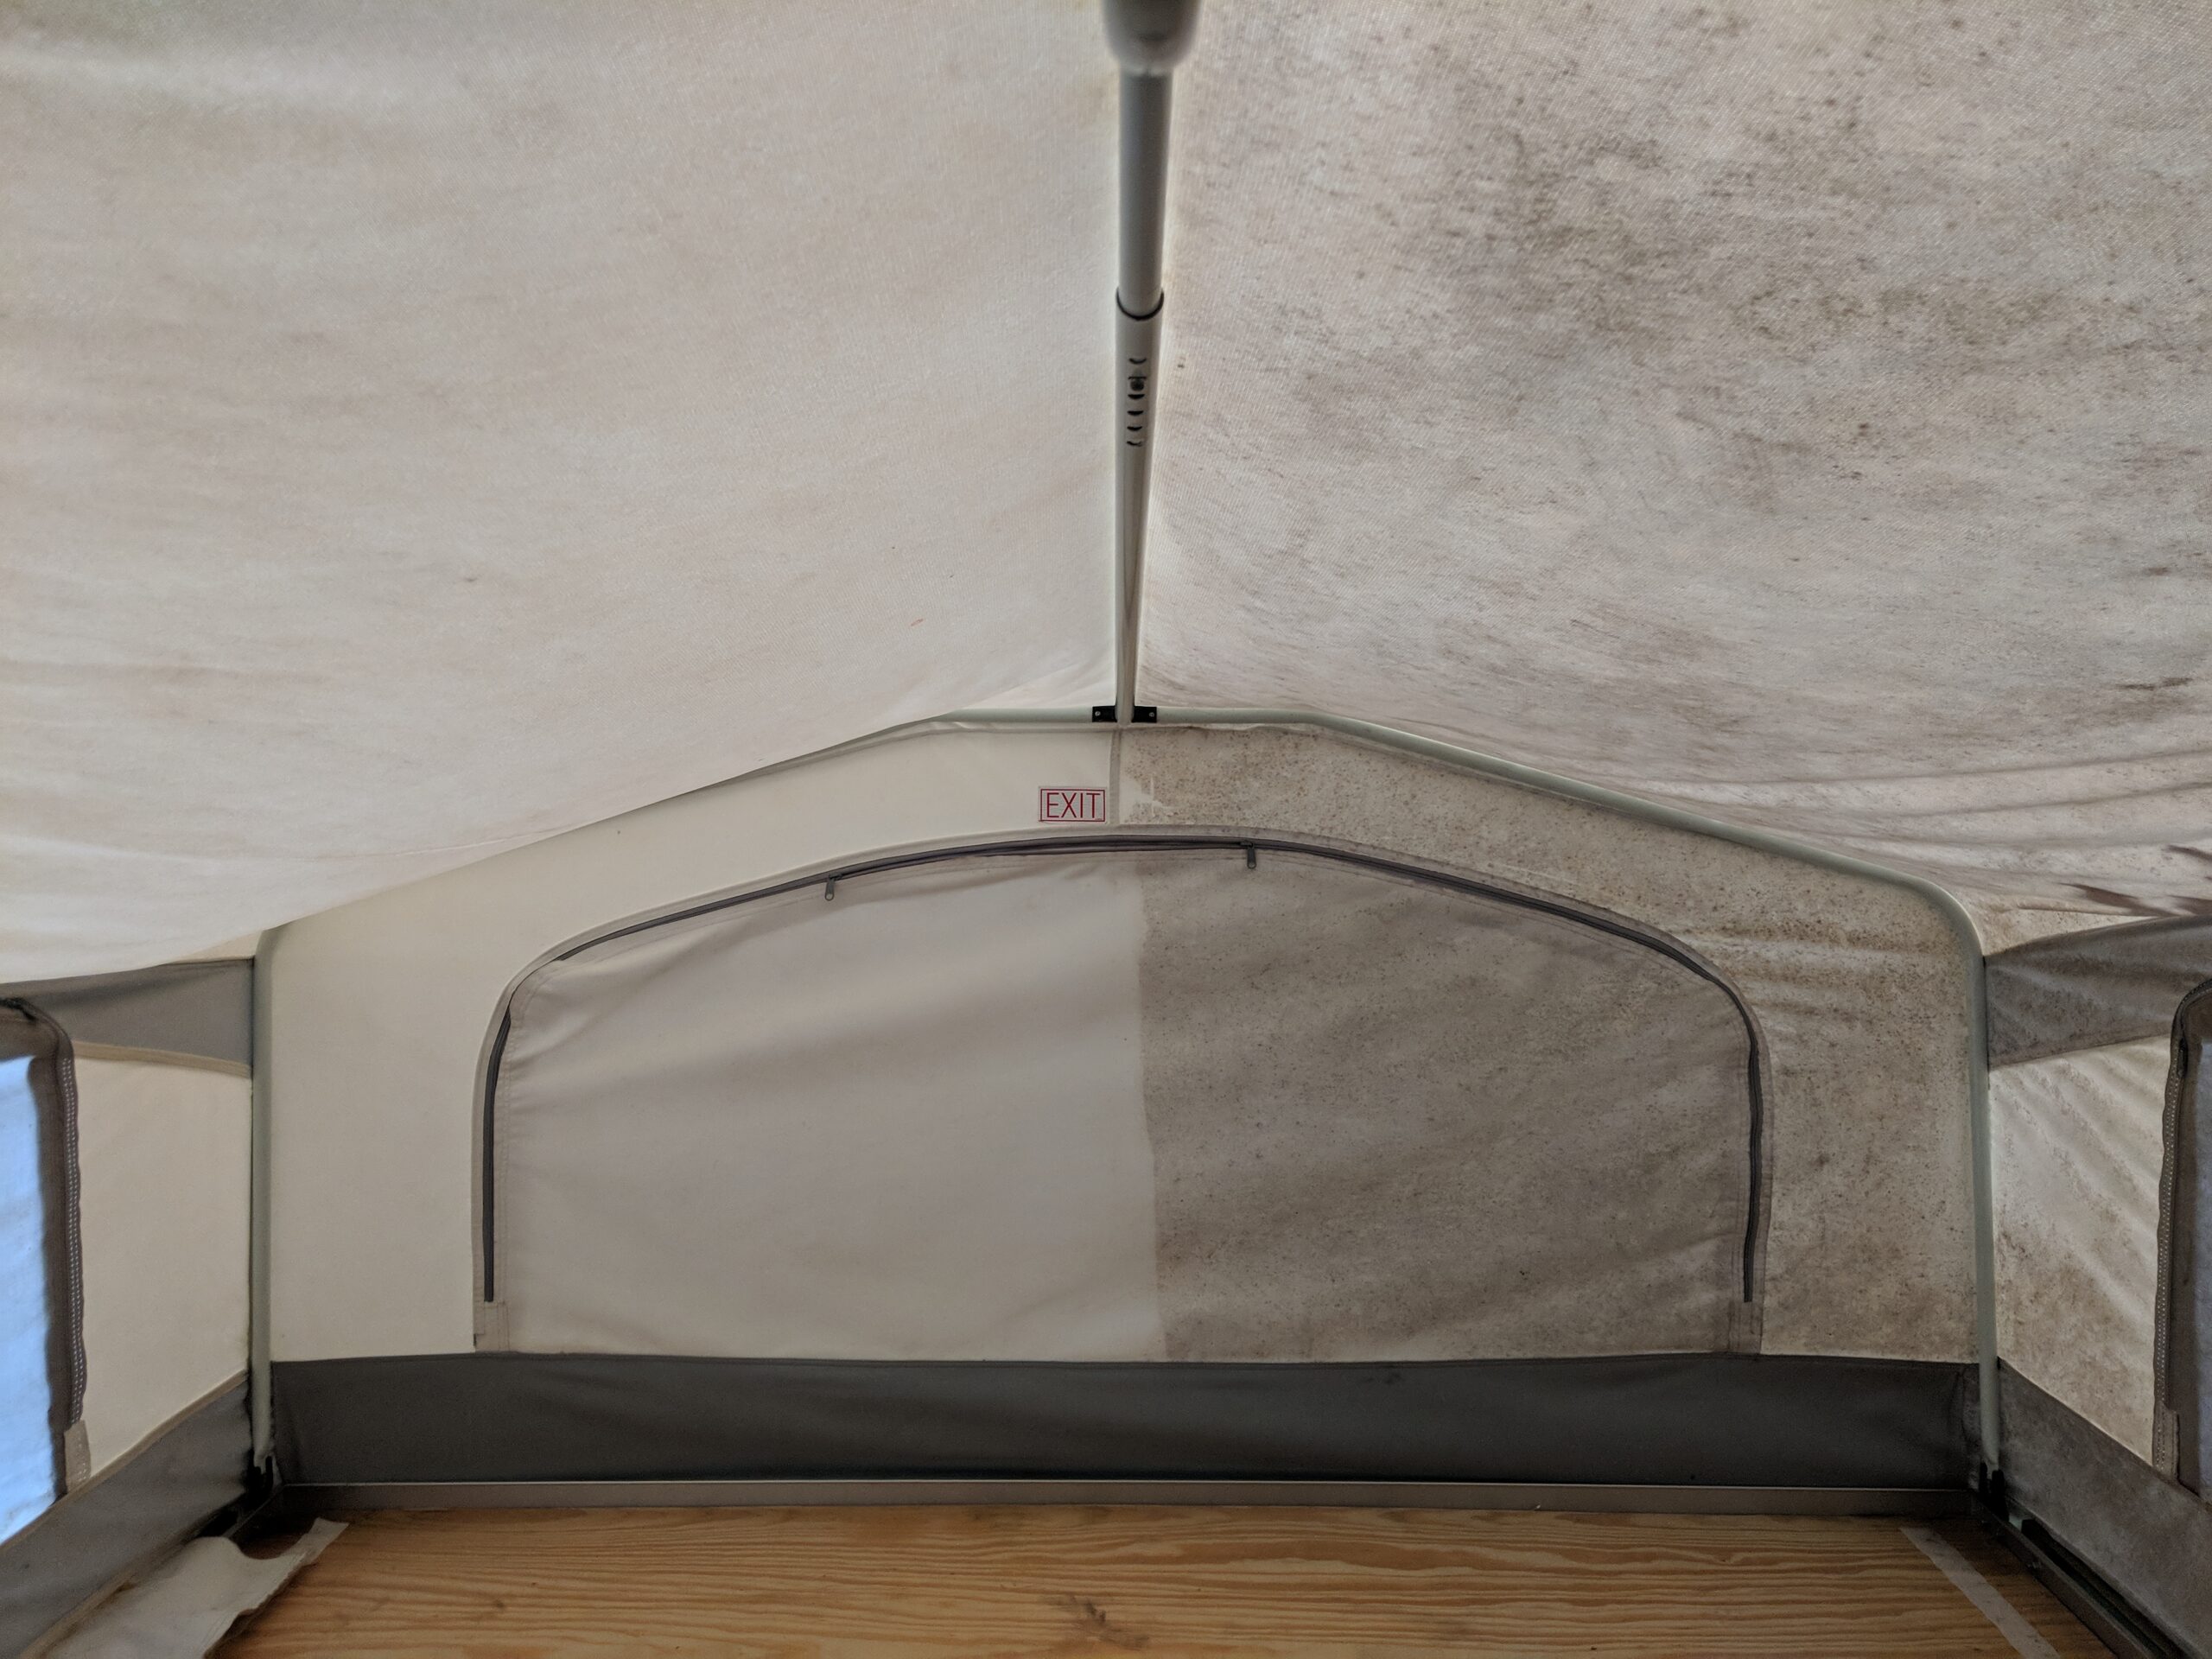
Cleaning the canvas before it gets bad is best, but not always possible. It’s a long process, but it will benefit you in the long run. If you’re anything like us, you may have let things get away from you which happens, we’re all human here.
Please note: VERY IMPORTANT*** As with cleaning anything new, please take the time to test on an inconspicuous, small area to test the product out on your specific materials. Things change, RVs can change their materials, and cleaning products can change their ingredients. This is very important to ensure you don’t create costly repairs or damage.
Maintaining the canvas on your pop-up camper is crucial for preserving its condition and ensuring a comfortable camping experience. Here are some tips to help you clean and care for the canvas:

Cleaning the Canvas
Begin by brushing off any loose dirt or debris using a soft-bristle brush. Next, use a mild soap and warm water to gently scrub the canvas, being careful not to scrub too vigorously, as this can damage the material. Rinse thoroughly with clean water to remove all soap residue.
When working on a project, it’s important to take the time to properly clean the canvas before starting. This may seem like an unnecessary step, but it can make a big difference in the final outcome.
Helpful Products
For tougher stains or mildew, you can use a specialized canvas cleaner. Look for products that are designed for outdoor fabrics and are safe for use on your camper’s canvas. Our go-to product is the Zep Mold Cleaner (find the link here). Avoid using harsh chemicals or abrasives, as these can compromise the integrity of the material. But sometimes the harsh chemicals are necessary and need to be used. The trick with this is to use something that is specifically made for canvas and cleaning it thoroughly afterwards to ensure there is no more residue leftover.
When cleaning the canvas, we did scrub both the inside and the outside of the canvas. In our case, the inside of the canvas was the worst part. The outside was just normal grime from normal outdoor conditions.
We also used this scrubbing brush for the best results. This can be a hard process so it makes it best if you have something comfortable and easy to hold. You’ll also likely need a few breaks as you’re working, it gets tiring.

Caring for the Canvas After Cleaning
Once the canvas is clean, allow it to air dry completely before closing the camper. This will help prevent mold or mildew growth. You can also apply a water-repellent treatment to the canvas to help it shed water and maintain its weatherproofing capabilities.
By following these simple steps, you can keep your pop-up camper’s canvas looking its best and extend its lifespan, ensuring many more years of comfortable and enjoyable camping trips.
Waterproofing the Canvas
Consider using a waterproofing solution on the canvas to create an additional barrier against moisture. This step feels pretty tedious after putting in the hard work of scrubbing the canvas but it is vital in order to go back to camping again. After cleaning the canvas can and likely will have some areas that are no longer waterproof. This can cause major issues the next time it rains and will create messes in areas that you assume will be dry. Waterproofing the canvas is a must! We used this product afterwards and applied it thoroughly to ensure we had no more leakage. This is the one we used, make sure to apply it liberally.

Preventing mold in the future
Proper drying of your camper is essential to prevent mold growth. Mold thrives in damp, humid environments, and a closed-up camper that hasn’t fully dried can provide the perfect conditions for it to take hold.
When moisture is trapped inside the camper, it creates an ideal breeding ground for mold spores. These spores can quickly spread, compromising the integrity of the canvas and causing health issues for campers. It’s crucial to ensure the camper is completely dry before closing it up for storage.
After each use, thoroughly clean the camper’s interior and exterior, paying close attention to any areas that may have gotten wet. Once cleaned thoroughly, allow the camper to air dry completely in a well-ventilated area before closing it up.
Cleaning the canvas involves removing any old residue, dirt, or other debris that may be on the surface. This ensures that the new paint will adhere properly and the final result will be smooth and even.
While it’s best to clean the canvas before starting a project, this isn’t always possible. Sometimes, the canvas may have been neglected for a while and the buildup of mold and grime is too much to tackle before starting a new work. This happens, don’t beat yourself up.
In these cases, it’s important to take the time to thoroughly clean the canvas, even if it means the project will take longer to complete. The long-term benefits of a clean, well-prepared canvas will far outweigh the short-term inconvenience.
By taking the time to properly dry your camper, you can avoid the headache and expense of dealing with mold down the line.
Camping with family is a great experience and taking care of your camper should just be a small thought in your plans. Thank you for reading and happy camping!
Check out our Amazon store to see our FAVORITE Camping products!
*Some items linked will earn us a small commission at no extra cost to you. Thank you so much for your love and support!


-
 Mom Flowers Accent Coffee Mug 15 oz$19.99
 -
 Dad Family is Everything Accent Coffee Mug (15oz)$19.99
 -
 Infant Baby Rib Bodysuit$24.00
 -
 Mama to the Bravest Heart Warrior – CHD, Heart Mom, Heart Mum, Gift, Christmas Ceramic Mug, (11oz, 15oz)$14.99 – $16.99
 -
 Cutie With a Tubie Infant Fine Jersey Tee – Tube Feeding, Gtube$21.00
 -
 In My Heart Warrior Era Infant Fine Jersey Bodysuit – CHD$21.00
 -
 Tubie Warrior Infant Baby Rib Bodysuit$25.00
 -
 I Love Someone With 22q Accent Coffee Mug (11, 15oz)$16.99 – $18.99
 -
 Let’s Get Toasted Ceramic Mug, (11oz, 15oz)$14.99 – $16.99
Thank you so much for all your love and support! Some links bring you to Amazon as I am an affiliate. I make a small commission from sales at no extra cost to you. Also, check out our Amazon Storefront with all of our favorite kitchen goodies!


Leave a Reply